Secure Remote Access To Your Raspberry Pi & IoT
Can you truly harness the power of your Raspberry Pi, transforming it into a remotely accessible command center, without the headache of complex configurations? The answer is a resounding yes, and it's more straightforward than you might imagine. The world of Internet of Things (IoT) and remote control applications has exploded, and at the heart of many exciting projects lies the versatile Raspberry Pi. However, the challenge of accessing your Pi from anywhere, anytime, has often been a barrier. This is where the true potential of your Pi can be unlocked.
The very nature of the Raspberry Pi presents a peculiar paradox. It's a marvel of compact computing, capable of powering a myriad of projects, from sophisticated robotics to home automation systems. Yet, to truly leverage its capabilities, you've often been tethered to it, bound by the need for a screen, keyboard, and mouse. This immediately limits the flexibility and convenience of this remarkable little computer. Fortunately, there are easy and secure solutions to bridge this gap, allowing you to remotely access and control your Raspberry Pi from anywhere in the world. This guide is designed to cut through the complexity and deliver actionable insights.
This article serves as a comprehensive guide, it will delve into methods such as SSH (Secure Shell), VNC (Virtual Network Computing), and other techniques for creating secure tunnels to facilitate seamless remote management. The article explores various approaches, from SSH and VNC to the innovative use of services like pinggy.io, all without the need for port forwarding, thereby enhancing security and simplifying the setup process.
- Daisy Melanin Latest News Updates Official Page
- Pepper0 Comics Family Anime Manga Art Styles Explore Now
Let's start with the fundamental challenge: the limitations of your home network. Imagine your Raspberry Pi sitting comfortably at home, connected to your router. Your router assigns it a local IP address, such as 192.168.0.101. This IP is only visible within your home network, effectively isolating your Pi from the vast expanse of the internet. This isolation, while providing a measure of security, presents a hurdle to remote access.
The first and foremost step in establishing remote access is configuring your Raspberry Pi. This involves setting up video streaming, using the Raspberry Pi camera for real-time monitoring or creating complex applications. Consider, for example, a Raspberry Pi robot, capable of streaming video. Alternatively, you may want to control camera servos or perhaps construct a comprehensive system that drives a car. The possibilities are truly limitless.
To illustrate the versatility of this, consider the example of a Raspberry Pi-based robot. Using your pi, you would be able to stream video, control camera servos, and link everything together to control the car with your commands.
- 7ap Store Download Hacked Games Apps On Iphoneandroid 2024
- Sd Movies Point Watch Download Movies Is It Legal
To successfully connect to your Pi remotely, you'll need a remote access application. You have a wide range of options here. Any remote desktop application that supports SSH or VNC will do the trick.
Accessing your IoT devices and Raspberry Pi over the internet, while appearing complicated, is easily done. The Raspberry Pi is the ideal device to host projects, and can be set up for numerous applications.
The need to directly connect a screen, keyboard, and mouse to use your Pi is inconvenient. Fortunately, there are several straightforward methods to access and control the Pi over a network or the internet.
Remote control of Raspberry Pi GPIO (General Purpose Input/Output) pins over the internet is a practical application. Controlling solar lights at home is a perfect use case. With remote access, you won't need to configure your firewall to allow the connection.
Heres a simplified table to further illustrate the core concepts.
| Topic | Description | Methods | Advantages | Disadvantages |
|---|---|---|---|---|
| Remote Access Basics | Understanding the challenges and opportunities of remote access to Raspberry Pi devices. | SSH, VNC, cloud services | Flexibility, anywhere access, project enablement | Security considerations, initial setup |
| SSH (Secure Shell) | Secure command-line access using encryption. | Using a remote access app | Simple, secure, versatile for command-line tasks | Requires command-line familiarity, less suitable for graphical interfaces |
| VNC (Virtual Network Computing) | Graphical remote access, mirroring the Pi's desktop. | VNC Viewer, RealVNC | Full desktop control, user-friendly | Can be bandwidth intensive, potential for security vulnerabilities if not configured securely. |
| Pinggy.io & Secure Tunnels | Bypassing port forwarding using secure tunnels | Pinggy.io service | Simplified setup, enhanced security | Requires an external service. |
| Raspberry Pi camera and video streaming | Streaming live video feeds from your Raspberry Pi | Raspberry Pi camera module | Enables remote monitoring and control | Requires camera setup and configuration, can be bandwidth intensive |
| Remote Control Project | controlling your devices, from your phone, laptop, or any other device | ssh and vnc | Convenience | Needs device setup |
The core issue is often that the router only assigns the IP address to your device within the internal network. However, there is a way to establish remote access, by using an external service or with your own VPN.
Imagine the potential: controlling your home automation system from a beach in Bali, monitoring your garden from a city apartment, or remotely managing your robotics project from a university library. The possibilities are endless, and the security concerns are addressed through careful configuration and the use of encryption.
To initiate remote access, youll need to start by configuring video streaming on your Raspberry Pi and you can then choose from different projects.
When you have remote access to your Pi, you can install vnc viewer software on your remote computer to access your pi over the internet. After setup, youll be able to control the Raspberry Pi remotely.
The ability to access your pi from anywhere opens up exciting new project ideas!
According to recent surveys, over 85% of new Raspberry Pi projects are internet of things or remote control based.
When establishing remote access, a solid internet connection is crucial. An Ethernet connection is highly recommended for speed and stability, especially for projects involving video streaming or real-time control. This will ensure a seamless experience and prevent frustrating disconnections. If an Ethernet connection isn't feasible, a stable Wi-Fi connection is your next best bet.
The remote device is your primary tool for controlling your Pi from afar. This device can be anything from a PC or laptop to a tablet or even a smartphone. The important factor is that it can connect to the internet and run the appropriate software for remote access, such as an SSH client or a VNC viewer.
The most crucial step is configuring the VNC viewer on the device you'll use for remote access. This viewer acts as your window into your Raspberry Pis desktop, allowing you to interact with it as if you were sitting in front of it. The configuration process varies slightly depending on the VNC viewer you choose. In general, it involves entering your Raspberry Pi's IP address (or hostname, if you have one) and the port number.
For added security, always change the default password of the 'pi' user on your Raspberry Pi. This simple step significantly reduces the risk of unauthorized access.
The most straightforward way to connect your Raspberry Pi remotely over the internet is by using SSH (Secure Shell). SSH provides a secure, encrypted connection to your Pi's command line. To achieve this, you will need an SSH client on your computer or device. Popular options include PuTTY for Windows, the built-in terminal on macOS and Linux, and dedicated apps for Android and iOS.
Once you have an SSH client installed, you will need to find your Raspberry Pi's public IP address. This is the IP address assigned to your home router by your internet service provider (ISP). You can find this by searching "what is my IP" on Google or by logging into your router's configuration page. However, the public IP address can change, so, it's often preferable to use a dynamic DNS service. Dynamic DNS provides a static hostname that always points to your Raspberry Pi, even if its IP address changes.
The next step involves configuring the SSH server on your Raspberry Pi. By default, SSH is usually enabled on Raspberry Pi OS. You may need to verify that it is enabled by running the command sudo systemctl status ssh. If it's not running, start it with sudo systemctl start ssh.
Using VNC (Virtual Network Computing) offers a different approach, providing full graphical access to your Raspberry Pi's desktop environment. This means you can interact with your Pi as if you had a monitor, keyboard, and mouse directly connected.
VNC has long been the best way to access any computer remotely on the same network.
To use VNC, you'll need a VNC server installed on your Raspberry Pi and a VNC client on your remote device. RealVNC is a popular and reliable option for both server and client.
Install the VNC server on your Raspberry Pi. You can do this by running sudo apt update, followed by sudo apt install realvnc-vnc-server. Once installed, configure the server according to your needs, including setting up a password.
On your remote device, install a VNC client. RealVNC provides clients for Windows, macOS, Linux, Android, and iOS. After installing the client, enter the public IP address or hostname of your Raspberry Pi, followed by the VNC port (usually 5900).
Setting up a VPN (Virtual Private Network) provides a secure and robust solution for remote access. A VPN creates an encrypted tunnel between your remote device and your home network, allowing you to connect to your Raspberry Pi as if you were on the same local network.
Several VPN server options are available, including WireGuard, OpenVPN, and PiVPN (a script designed to simplify the installation of OpenVPN on a Raspberry Pi).
To set up a VPN server, you'll first need to choose a VPN server software and install it on your Raspberry Pi. Follow the specific instructions for your chosen software. This often involves installing the necessary packages and configuring the server.
Once the VPN server is set up, you'll need to configure a VPN client on your remote device. This client will connect to your home network through the VPN tunnel. The client software will also vary depending on the VPN service.
A final technique involves using an external service, like RealVNC's cloud VNC viewer.
To use a service like RealVNC, you'll need to create an account with them. This usually involves downloading and installing the RealVNC server on your Raspberry Pi and connecting it to your account.
After setting up your account, install and configure the VNC server on your Raspberry Pi and connect it to your account. You will then be able to access your Pi from the RealVNC viewer, using your account credentials.
Always prioritize security. Change the default password on your Raspberry Pi to a strong and unique one. Keep your Raspberry Pi's software up to date, as updates often include security patches. Be mindful of the ports you open on your router and only forward the ones you absolutely need. Consider enabling two-factor authentication (2FA) where possible.
By using these methods, you will be able to work on projects and manage your Pi without needing physical access.
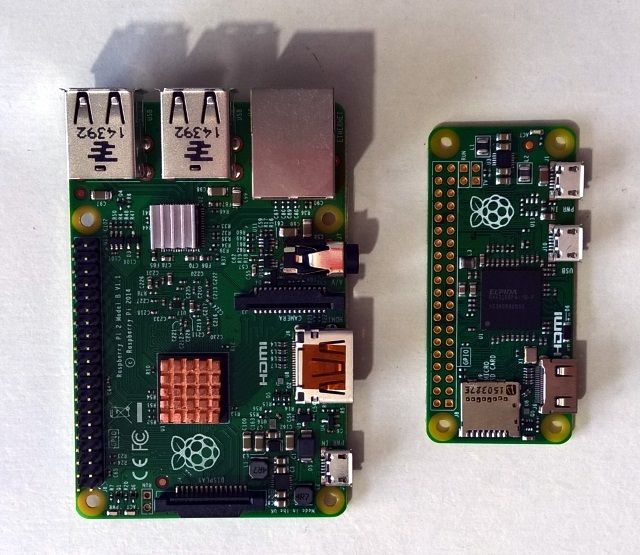
To control your Raspberry Pi from your phone, youll need a raspberry pi board (any model from pi 3 or newer, though the raspberry pi 4 capabilities offer the best experience), a power supply, and a microsd card with at least 8gb storage.
Fortunately, there are several easy methods to access and control the pi over a network or the internet.
In this comprehensive guide, we will explore the most common and easy methods to connect to your raspberry pi remotely over a network or the internet.
There is no need to expose SSH or VNC on your raspberry pi over the open internet. You can establish a VPN, or use an external service like realvncs cloud vnc viewer.
Remote log into your raspberry pis full operating system using vnc connect.
In conclusion, the ability to remotely access and control your Raspberry Pi is more achievable than ever. By understanding the different methods available and implementing the appropriate security measures, you can unlock the full potential of your projects and enjoy the freedom of managing your Raspberry Pi from anywhere in the world. With the information provided, you are well-equipped to begin your remote access journey and unlock the limitless potential of your Raspberry Pi projects.
- Sam Kerr 13 Facts About Australias Soccer Superstar You Need To Know
- Sarah Saldmann The Lawyer Media Figure Explained Who Is She

How To Use Remote Control Raspberry Pi Over Internet Without Third
How To Control LED Over The Internet With Raspberry Pi Pico W Using
How To Use Remote Control Raspberry Pi Over Internet Without Third
